Dinosaur coin savings bank, a really creative piggy bank. The best thing is it is simple to make from just cardboard and a plastic jar! Let’s get started.
How To Make A Dinosaur Coin Bank
Your children can help with this project, but you will need to take care of the cutting out to make sure the edges are neat. They can have all the fun of painting and decorating the super dinosaur.
This really is such a simple idea and once you have got the hang of it you can create many other different animal shapes to store your coins. Kids will just love watching the coins roll into the jar and once they have saved enough it can be simply emptied and they can start again. A super cute way to save pocket money. Let’s see what we need to start.
What You Need To Make Your Dinosaur Coin Bank
This fantastic dinosaur coin saver craft only needs a few things. You will need to ensure you have enough cardboard to make 3 dinosaurs. This is what you will need:
- Hardwearing cardboard (you can use and old box)
- Pencil
- Cutter or sharp scissors (not for use by the children)
- Plastic jar with lid
- Paint, glitter, glue, shapes, whatever creativity your child wants to bring to the table
- Glue
Getting Started On Your Dinosaur Coin Bank
Step 1: Use a pencil to draw your dinosaur shape onto the card. If you can find a template online to draw around that would be even better.
Use the sharp cutter and cut around the dinosaur shape you have just drawn.
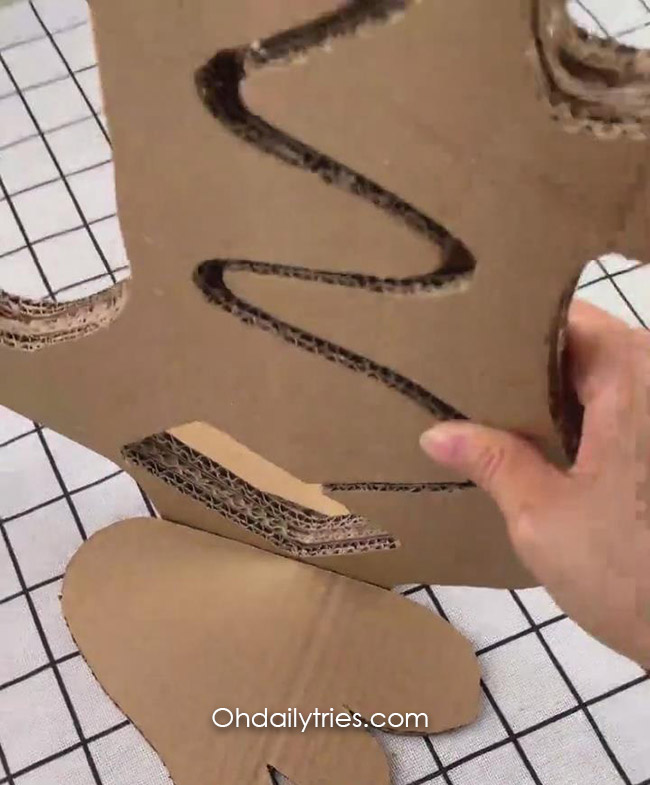
Place the jar towards the bottom of the dinosaur and draw around it. Then use the pencil to draw a wavy line from the mouth down to the jar (this makes the coin slot oesophagus).
Use the cutter to cut out the jar shape and the oesophagus.
Repeat step 1 and draw your second dinosaur shape.


Step 2: Place the second dinosaur underneath the first one and draw around the cutouts.
Cut out the shapes you have drawn so the second dinosaur is identical to the first.
Repeat step 1 to create your third dinosaur shape.
Place the third dinosaur under one of the other dinosaurs and draw the oesophagus. This time you will need to make the oesophagus wide enough to accept a large coin.
Place the dinosaur with the larger oesophagus between the other 2 dinosaur shapes and glue in place.

That’s it for the shaping!
Next We’ll Add the Feet
Step 3: Draw 2 dinosaur feet on your cardboard and cut out.
Glue the dinosaur feet either side of the bottom of your dinosaur.


Ready For The Coin Box
Step 4: Create a coin slot in the lid of your plastic jar. Make sure it is wide enough to accept the coin.
Place the lid on the plastic jar and put this in place at the bottom of the oesophagus ready to receive the coins.
Finish the dinosaur with an eye on each side, nostril and any other decorations your little ones want to add.

That completes this cute DIY dinosaur coin box piggy bank.
