An origami pencil holder gives us a pen when we need it the most. This will help us organize as it adds a pop of adorable colors to match up to our desk. It can also be used as a vase for toy flowers, a gift, and with great care can stand for years.
HOW TO MAKE PEN HOLDER
Messy desk, out of the way! Tidy the desk with its spiral casing that helps us reach our goals as we watch it with awe. The DNA like structure will make us feel like an architect building our desk at a higher level!
Continue reading for video tutorial.


MATERIALS NEEDED TO MAKE 3D ORIGAMI
- 1 pad of colored paper
- 2 square colored paper
- 1 Toothpick
- Glue
First, prepare your materials
Step 1: Cut the papers into 4 equal lengthwise pieces. Fold the paper into half lengthwise twice until 4 equal parts are made then cut it.

Next, roll the strips until it becomes a straw
Step 2: Get the toothpick and roll the paper diagonally from the upper right corner of the strip until it reaches the down left corner of the strip.
Do this for the rest of the striped papers.

Then, make the base of the pencil holder
Step 3: Create two paper hexagons as a base.
Fold the square paper in half to create a crease.
Start from the upper left corner as the apex for the first long triangle. Place the down left corner on the half crease until a triangle is formed then fold it.

Next, put the upper left corner on the half crease as it overlaps the triangle until a diamond shape is formed with excess paper side. This diamond will serve as a guide for the next triangle. Then, fold the upper right corner inward following the edge of the diamond until a long triangle is formed. Then, fold the down right corner inward until a full diamond is formed.
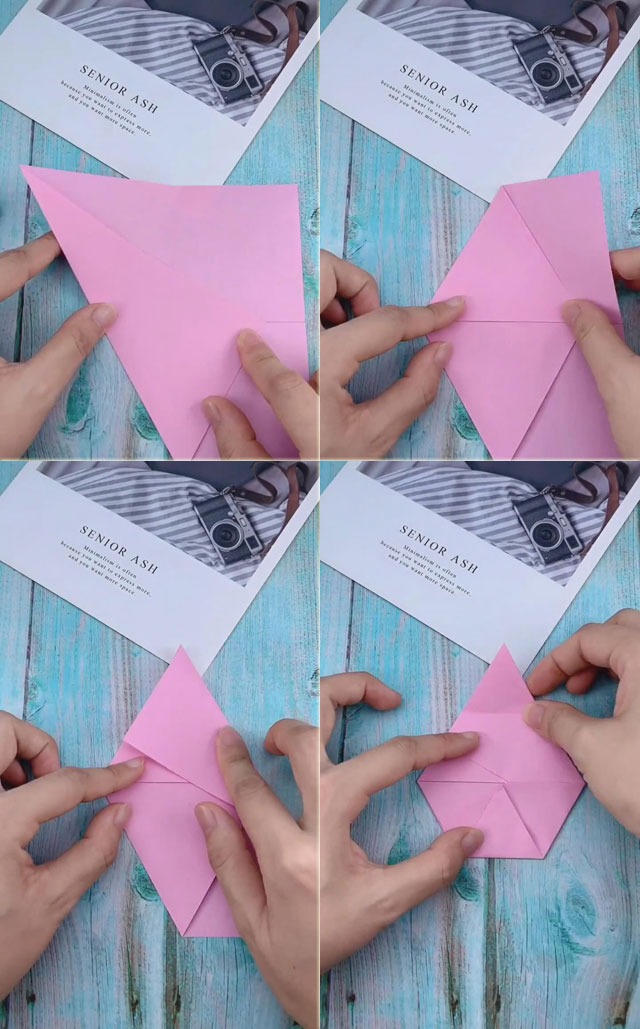
Next, fold the diamond in half lengthwise but crease only the center of the diamond.
Lastly, fold those up and down corners towards the center of the diamond until a complete hexagon is made. Glue the center to hold it in place.

After that, glue the paper straw on the base and start building!
Step 4: Get one of the hexagons and glue the tip of the seven straws on the base. One corner will have 2 straws while other corners will have one straw.
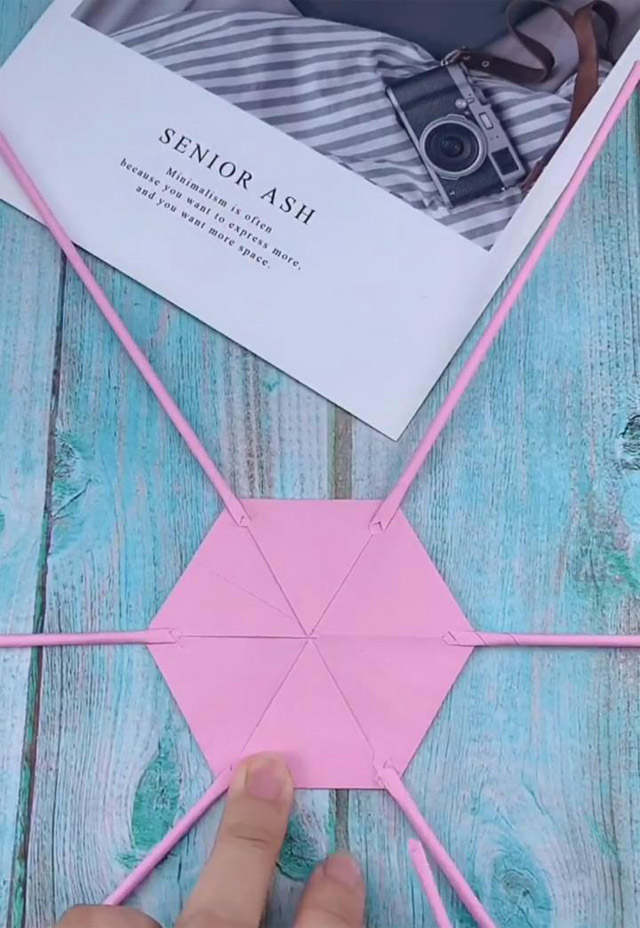
Glue the second hexagon over the base hexagon which should sandwich the straws.
Step 5: Fold each straw following only one edge. Every time the straw reaches another corner, the next corner straw will continue following the next one edge. Then, the next straw will follow one edge, and so on. Insert a new straw over the old straw to make it longer.
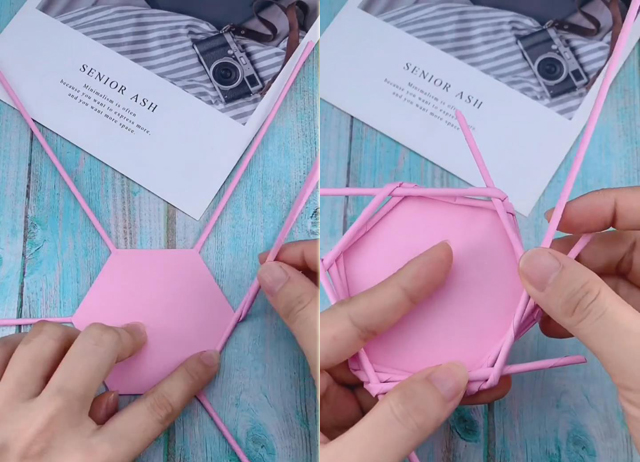
Finally, lock the straw and you’re finished!
To lock, fold one tip of the straw inward while cutting off the excess in other straws.

Now, our desk organizer is ready for pens, pencils, scissors, and other materials. This simple yet astonishing craft can also be used for an old newspaper if you want a classic look. You can also paint in and get creative such as putting glitters or crafty items to make it wonderful. Have fun organizing!