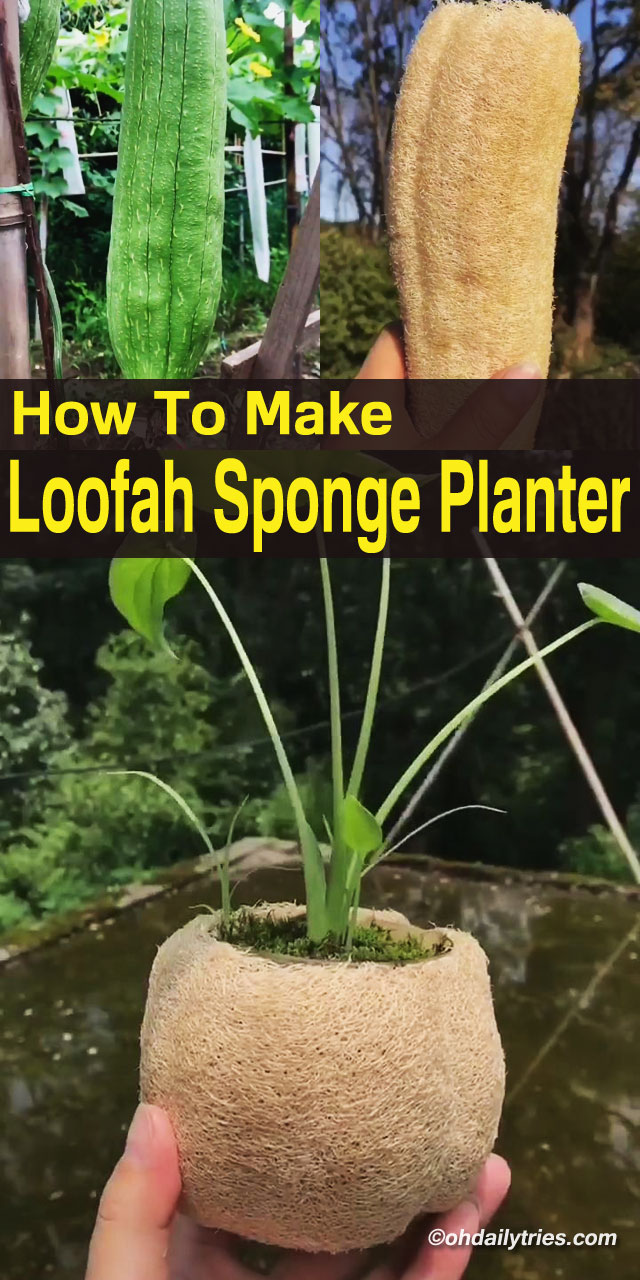
If you are looking for an unusual planter to grace your table (or as a gift), why not consider a loofah sponge planter. It not only looks great but is suitable for any small plants you may want to display.
Grow It Yourself
Many people choose to grow loofahs themselves as they can be easy to grow in your backyard. They usually take around 90 days to grow to maturity so if you are making a loofah planter as a gift for someone you might need to factor that into your calculations if you are growing from seed.
How To Make A Loofah Sponge Planter
Loofah Sponge craft is a simple idea that is creating a buzz at the moment. Loofah is a natural material that can be used for a variety of things, not just to get clean in the bath! Once your loofah is ripe allow it to dry naturally on the stem. When it is completely dry we are ready to create our loofah sponge planter.
What You Need To Make Your Loofah Sponge Planter
You don’t need much for this craft. You just need:
- Large natural loofah (grown yourself)
- Plastic bottle (not too wide – needs to be inserted into the loofah)
- Tweezers
- Sharp knife
- Soil or peat
- Small plants or cuttings from other plants that will root easily, such as aloe vera or cacti
- Moss
Getting Started On Your Loofah Sponge Planter
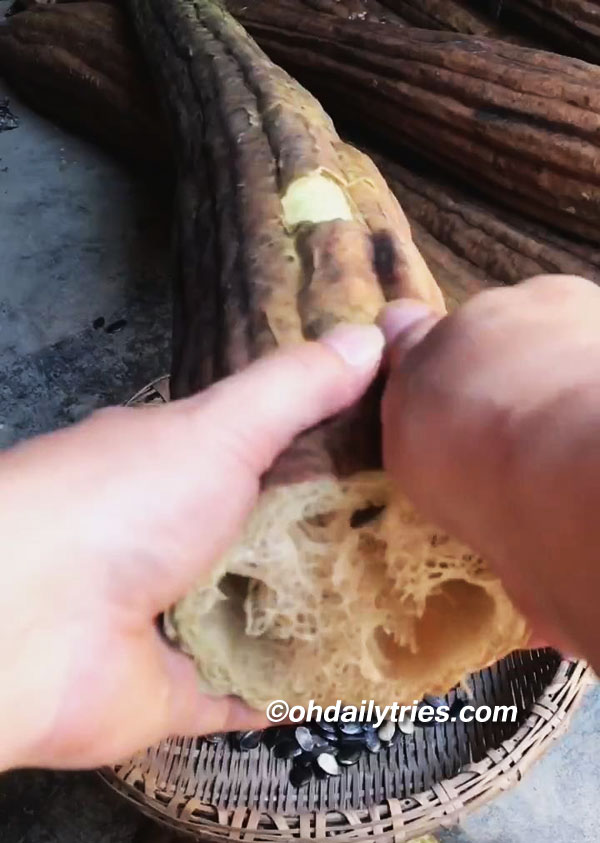
Step 1: Strip the outer edges from your loofah to reveal the actual yellowy loofah inside. They should peel away quite easily. You can do this with your hands or use a tool such as a blunt knife or shears. Be careful of your fingers!
Step 2: Next cut the loofah into sections (make them as big or as small as you want as long as your bottle will fit inside). You may be able to get 2 or more planters from the one loofah.
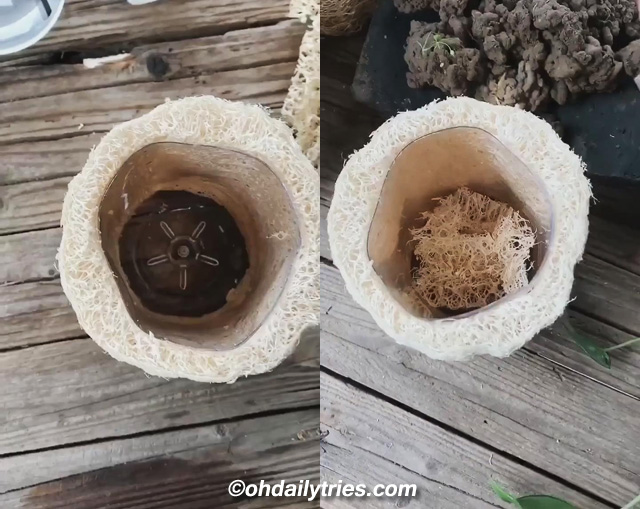
Step3: Remove the middle of each of the sections of the loofah and crush a little ready to use in the bottom of your plastic bottle.
That’s the first bit completed! Phew!!

Next We’ll Fill the Planter
Step 4: Cut a few small holes (or drill) in the bottom of your bottle for drainage.
Step 5: Insert your plastic bottle into the hollowed out loofah and if it is too long use the sharp knife to cut it to the exact height of the loofah.

Step 6: Put the crushed loofah pieces of the loofah into the bottom of the plastic bottle as in the diagram (this is to retain water for your plants).
Step 7: Place a little soil in your bottle.
Step 8: Take your plant cutting and place in the center of the plastic bottle and using the tweezers draw up the loofah material around its roots.
Step 9: Finish off by placing more soil over the roots of the plant and place moss over the top of the root system. Perfect!

Step 10: Lightly spray your plant with water.
Step 11: Display your loofah sponge planter wherever you want.
And there you have it! Your first Loofah Sponge craft. If you have any loofah sponge leftover you can use that in the bathroom for its more traditional use.