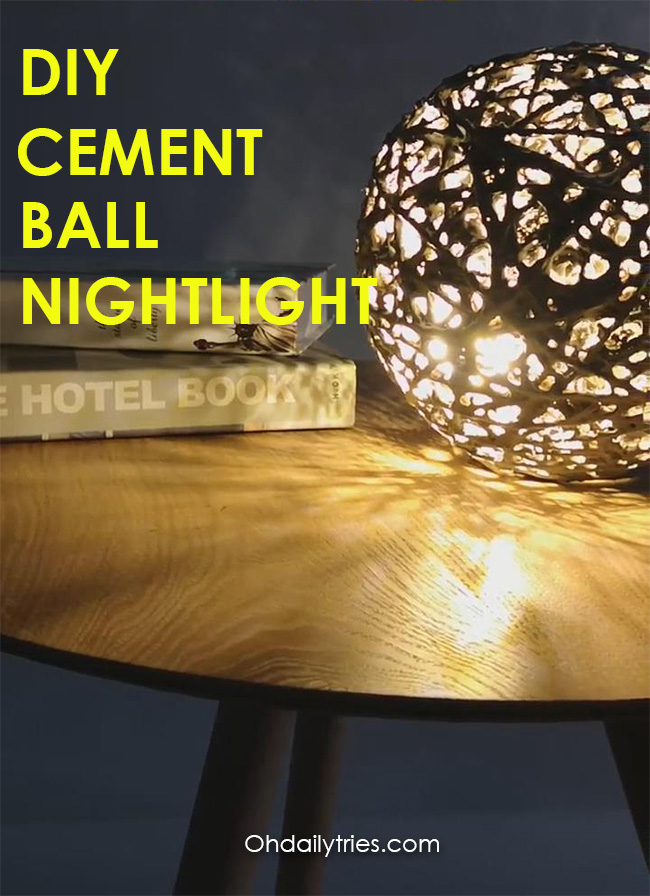
Are you into concrete and cement casting crafts? A newbie might think this style of craft is only for rugged people willing to work with heavy shovels, mountains of cement, wheelbarrows of water and messy overalls. Hey, quite a trifling imagination you got there. What if you were told that you can create miniature, whimsical, delicate and playful ornaments with cement and concrete? Oh yeah? Yeah! Whimsical, delicate, playful! Hey, a light bulb moment! Let’s do a Cement Ball Light! This project is so easy, any newbie can make it with minimum effort yet with impressive results. It’s an all season cement ball light, for indoor and outdoor. It’s made of cement, people. It can illuminate your outdoor space in a funky way and make your space instagrammable. You can make miniature versions. Imagine miniature versatile cement ball lights that can hang around your porch, your garden, your backyard, even in a small apartment balcony, around the house all year round. A change of string lights for every season is all you need. Indoor, it can be a dramatic piece in any corner of your room. It can spruce up any dull nook and corner. Cozy up with your favorite book with your ball light offering you dreamy fluorescence. Creative yet functional.
MATERIALS YOU WILL NEED
- Balloon – choose the size which fits your desired lamp size
- Rattan Yarn
- Cement – Portland cement is commonly used for art projects. You can ask your favorite art shop for recommendations. But for this project, a quick setting cement which sets in 15 minutes and can be unmolded within an hour like RapidSet Cementall, is best.
- Water
- Spoon
- Small disposable bowl for easy clean up
- Paint brush
- String LED lights
For a clean work area : Cover your work area with newspaper and plastic because it can get messy.
LET’S DIY!
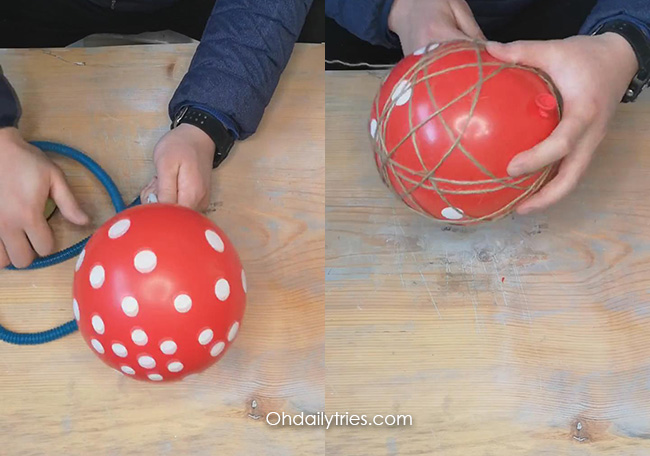
1. If you can score a balloon from any of your friends or family who just had a party, ask! Otherwise, inflate your balloon.
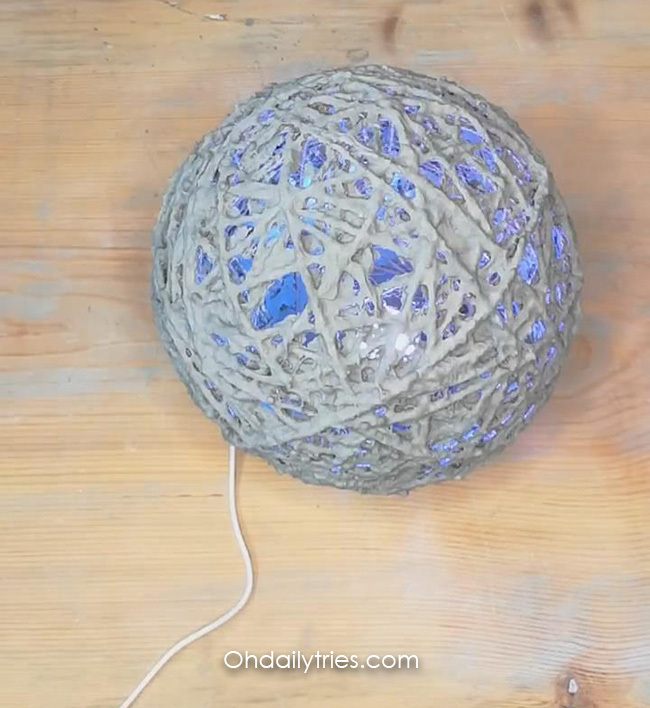
2. Begin to unroll your yarn and carefully wrap around the balloon. You can initially tape the yarn on the balloon to hold it secure until you have wrapped around a few times. Then remove the tape and continue to wrap around. Do it in different directions. But remember to leave open spaces between yarn all around because this is where the light will diffuse through. Imagine how much stream of light you want your ball to shoot out. That is how many yarn holes you want to make.
3. In a small bowl, place a small amount of cement. Slowly add water to the cement and mix with a spoon. Mix well after each addition. Add water until you get the consistency of a runny pancake batter.
4. Using your brush, apply cement on the balloon covering the yarn. If you run out of cement, you can prepare a new batch.

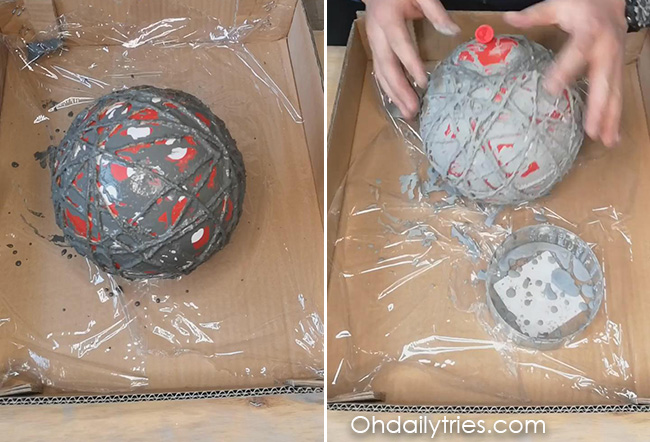
5. Let it stand and dry for at least an hour. The longer you wait, the better.
6. Deflate the balloon.
7. Insert your LED lights into one of the holes.
8. Light and shine!