I love mornings! Sunshine or shade, I love mornings. And knowing that, in about 30 seconds you can enjoy a nice Gloria Jean’s Butter Toffee (or whatever is your latest fancy flavor), can make you literally jump out of bed.
Everyone who has a Keurig coffee machine will be one in saying, “I adore this machine but…those little cups, how to keep?!” Now, imagine an organized “beverage station”. What about a charming beverage station too? This project will teach you how to make a whimsical K-cup holder to display those little k-cups. So don’t think of just stashing them away. Flaunt them! It will make your beverage station a morning wake-me-upper. Just thinking about it each morning, and even many times through the day, will make you head to your beverage station for frequent coffee breaks. Definitely a conversation piece.
Materials:
- 1 piece Craft Pumpkin (“carveable” type, hollow on the inside)
- Pencil
- Craft knife
- Drill with 3 consecutive sizes drill bits
- Corded light bulb
Instructions:
1. First thing to do is to decide on the design you want and where to put your design on the pumpkin. For this project, we will do a steaming cup design.
2. With the pencil, sketch your design on the pumpkin.
3. Ensure that your design will leave enough space at the bottom of the pumpkin, which serves as the bowl to hold your k-cups. And wide enough (for the opening) for one to reach inside the pumpkin comfortably.
4. Using a craft knife, carefully cut out the coffee cup design. This will serve as the opening of the k-cup holder. Remove the cut out very carefully to avoid breaking the pumpkin. Use a pencil or any object which can push the cut out from the inside of the pumpkin.
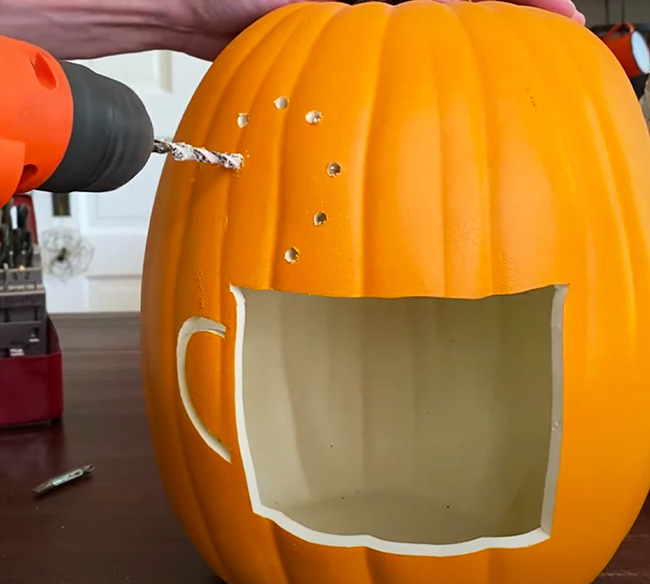
Image by Christopher Hiedeman via YouTube
5. Create illusions of “steam coming up from the cup” by drilling holes in spiralling patterns. To do this, gauge the size of the drill bit which matches the size of the biggest hole that you want. Using this, drill holes in a spiralling pattern over the cup hole. Using the next smaller drill bit, drill holes in between the big holes. Switch to the next smaller drill bit and punch holes between the two previously punched holes. You may use the tiniest drill bit to create accents around the pattern.
6. Next is to add light.
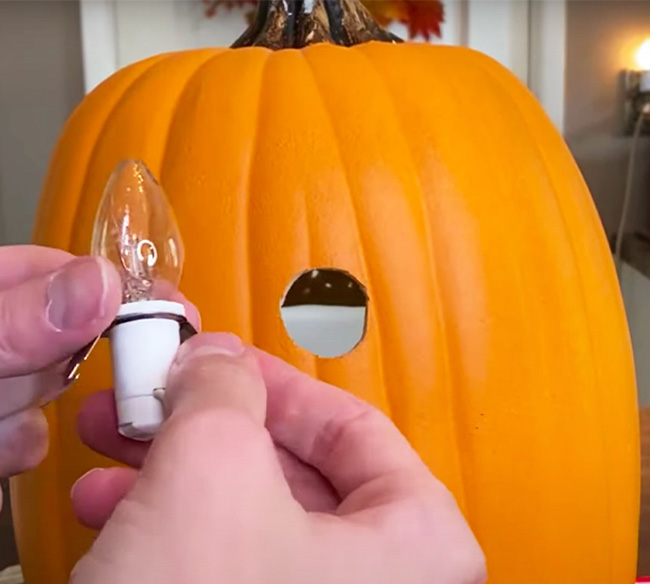
Image by Christopher Hiedeman via YouTube
7. Brush off dust from the pumpkin. Turn pumpkin around. The placement of the light should not be too high exposing the cord from the front or too low touching the k-cup.
8. Using the craft knife, carve the hole. Insert the bulb.
9. Toss your k-cups inside the pumpkin and turn on light!