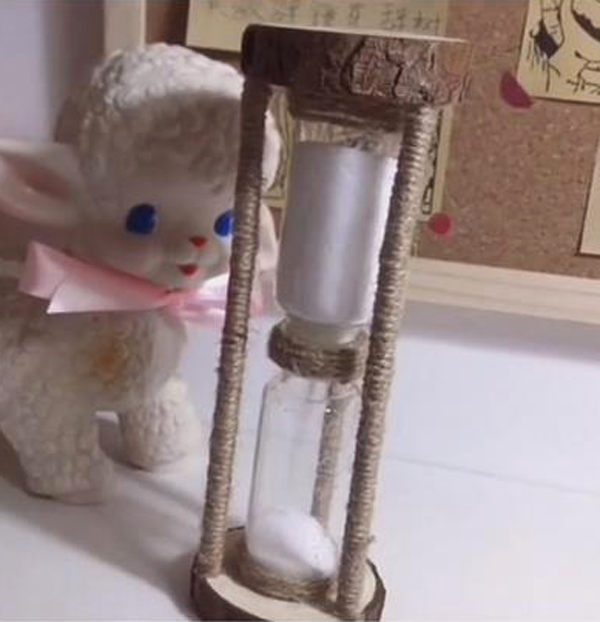
If you are looking for a cheap, rustic timer for less than $5 look no further. Here we present an unusual timer that will look great in any country kitchen.
Make It From Recycled Items
Many of the pieces you need to make this super diy hourglass timer can be found in and around the house. You can find essential pieces of wood in any wood clearing and anything you don’t have you can buy very cheaply.
You don’t need great expertise in creating crafts, but some bits may be a bit fiddly, so you will need to be a bit dextrous.
What You Need To Make Your DIY Hourglass With Recycled Materials
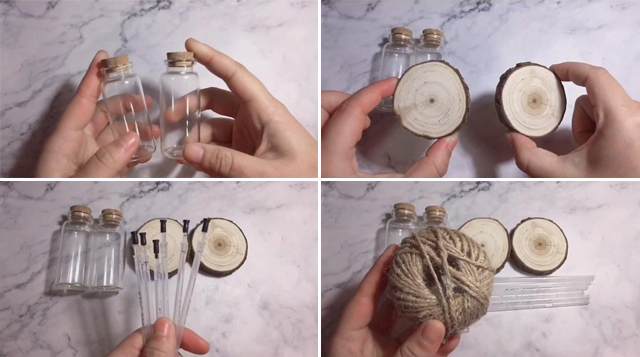
You don’t need much for this craft and what you don’t have you can buy very cheaply. The whole craft should cost less than $5. You need:
- 2 glass bottles with lids
- 2 large wedges of wood as per the diagram
- 3 empty refills (or strong, straight twigs)
- Small ball of hemp
- Salt
- Glue gun
- Drill
- Drinking straw
Getting Started On Your DIY Hourglass
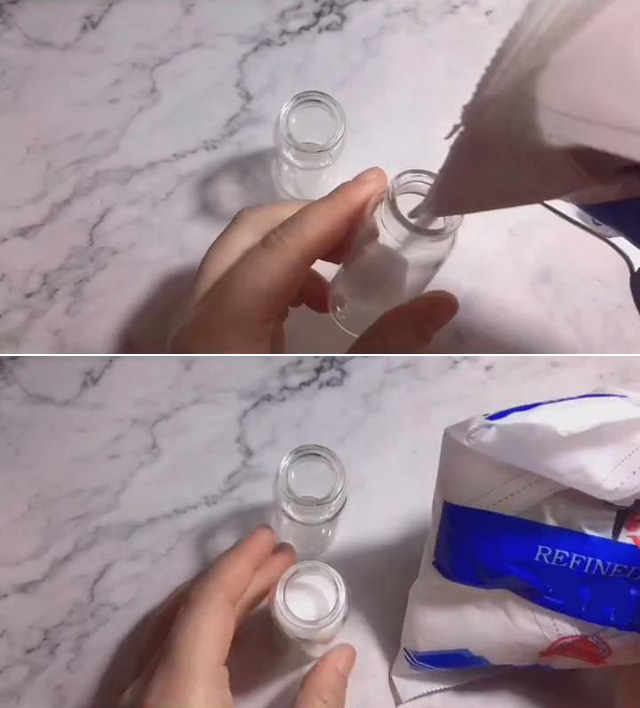
Step 1: Remove the lid of one of the glass bottles and pour salt into it up to about 2/3 of the way.
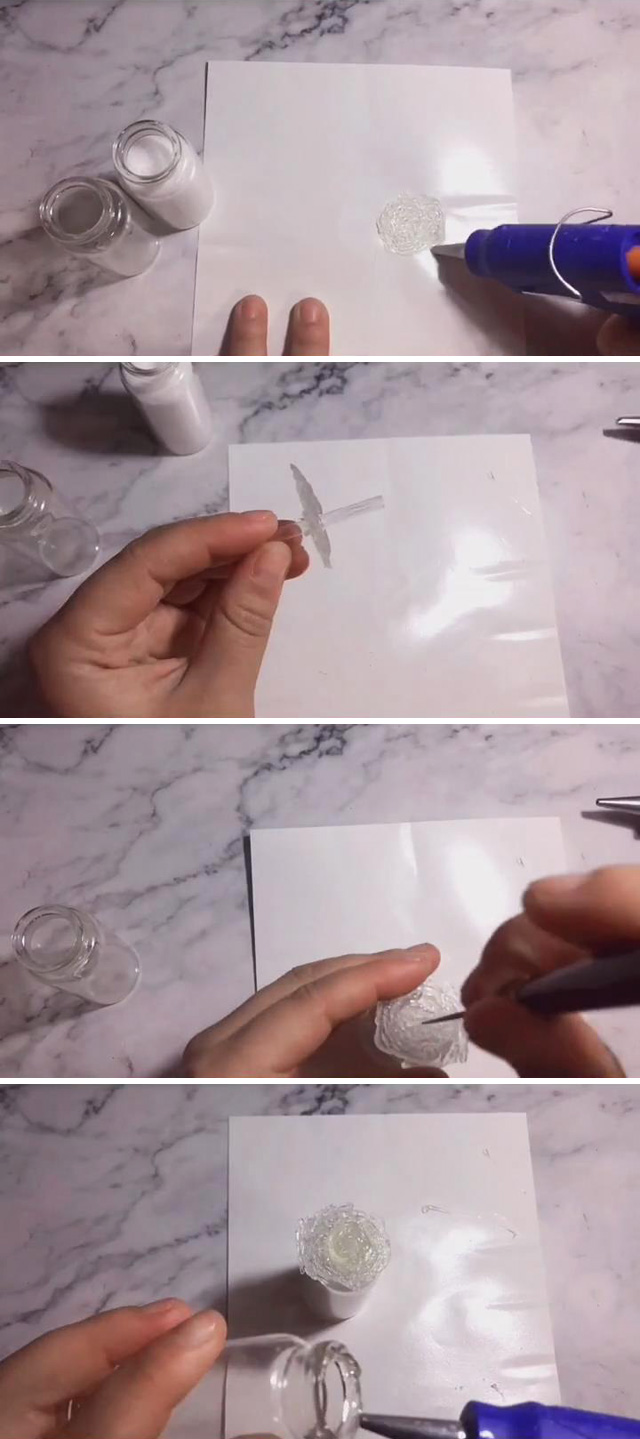
Step 2: Pour out a large round circle of glue with the glue gun onto a marble surface. This is to create a seal between your 2 bottles.
Step 3: Cut your drinking straw and insert into the middle of the glue circle before it hardens (to help the salt flow through). It only needs to be very short.
Step 4: Place the glue circle onto the open top of the bottle with the salt.
Step 5: Put a little glue around the open edge of the second bottle and fix to the first and allow to set.
That’s the first bit completed!
Next We’ll Finish Off The Timer
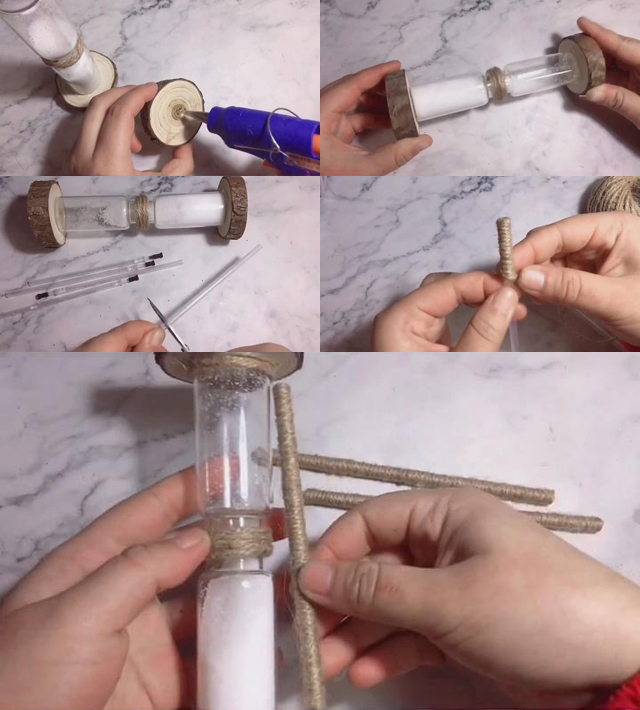
Step 6: Put some glue onto the wooden wedge and fix to the bottom of the bottle you have just filled. Do the same for the other end – just like the diagram.
Step 7: Place some hemp around the centre where your two bottles meet (to hide the glue).
Step 8: Take your 3 empty refills and cut so they fit on the inside between both ends of your timer.
Step 9: Wind the hemp all the way around each of the refills and glue each end to make sure the hemp stays snug.
Step 10: Glue top and bottom of your refills and space out between the wooden wedges at intervals (this will make a triangular shape).
And there you have it! A superb DIY Hourglass Timer. Of course, you don’t have to use it in the kitchen, you can use it anywhere you need to put a timer on. You may want to check how long it takes for the salt to run through so you have an idea of how much the timer is for. You can make larger or smaller versions for different times and you can, of course, decorate it in any way you want. You could just use it as a rustic decoration in the country kitchen.