If your office desk or table in your living room is too empty, you can easily decorate it with tabletop elements. It is very common to place plants, clocks, trays, magazine racks or many other options.
Sometimes, crafts are also used. It is very common that in schools children are sent to create table decorations for the classroom. So if what you want is to decorate it with your creativity and your talent, here we bring you a very simple and safe craft to do with your family.
Make yourself a beautiful bicycle to decorate your desk or organize your office supplies with old CDs, ice cream sticks, some wool and a plastic cup.
Materials needed:
– A ball of wool (the color you prefer).
– 6 blank CDs.
– 18 wooden craft sticks (like those ice cream sticks).
– A paper or plastic cup.
– Plastic pearls (or other decorative elements).
– Scissors.
– Glue.
Instructions:
Step 1. Prepare the wheels
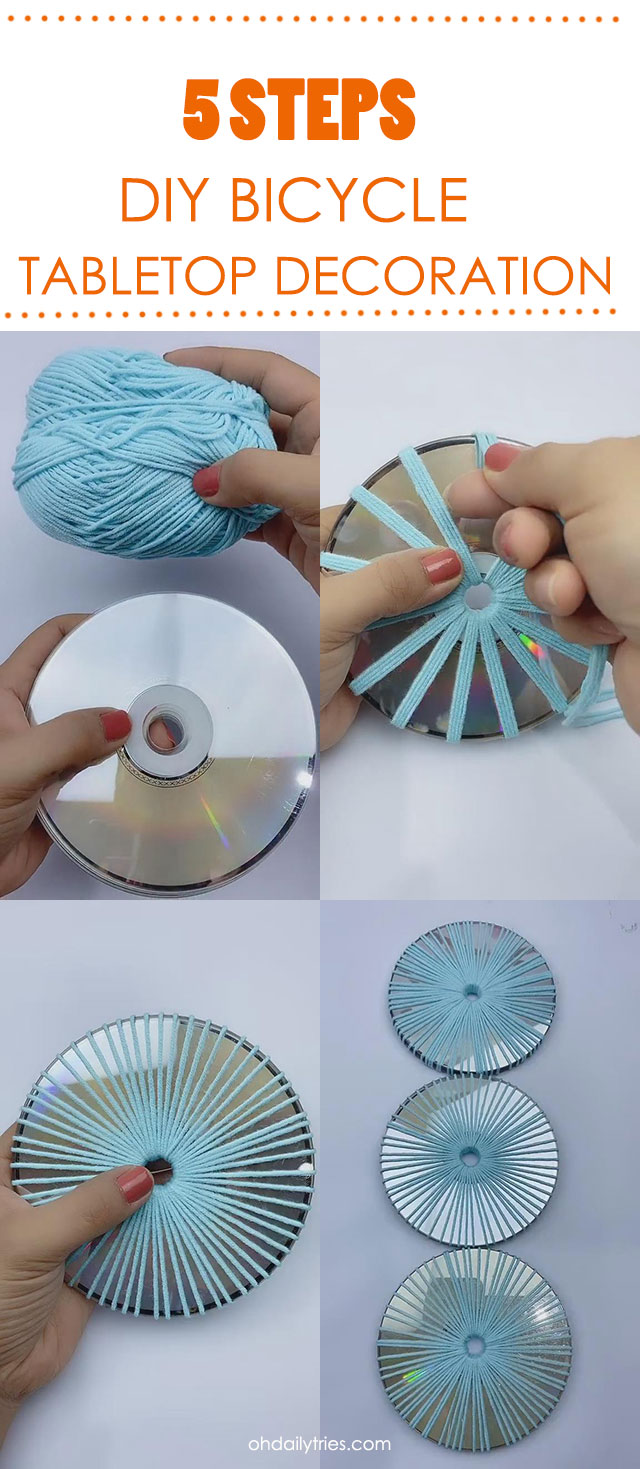
We will make a three-wheeled bicycle. To make each of them, we will need two CDs and some yarn. The reason we will use two CDs instead of just one is because that way the wheels will be thicker and we will gain stability.
Place the CDs next to each other and wrap them in wool. Pass the thread through the hole in the center and make it cross the entire radius to the outside. Then, on the other side, put it back through the hole. This will represent the spokes of the wheels, so repeat it enough times to make them look good, but not too many times. Do not cover the entire surface of the CD with wool.
Use the glue to stick the beginning and end of the thread to the CDs. You can put only one drop for each string on the ends of the CDs (both on the edge and inside the hole) so that the spokes of the wheels do not move out of place.
Step 2. Prepare the bicycle frames.
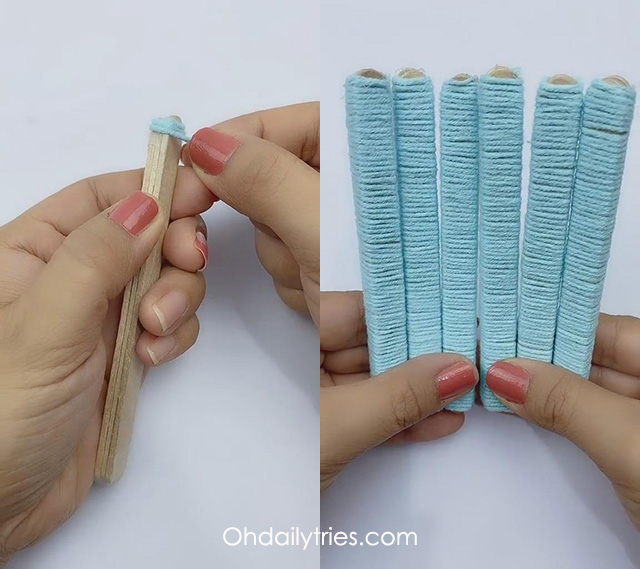
To make the tubes we will need three craft sticks for each one, to give it volume.
We will put the three together, one on top of the other, and we will wrap them in wool. This time, they must be well wrapped so that the wood of the stick is not visible. You may need glue to keep the wool on the sticks from coming loose.
Step 3. Prepare the bike seat
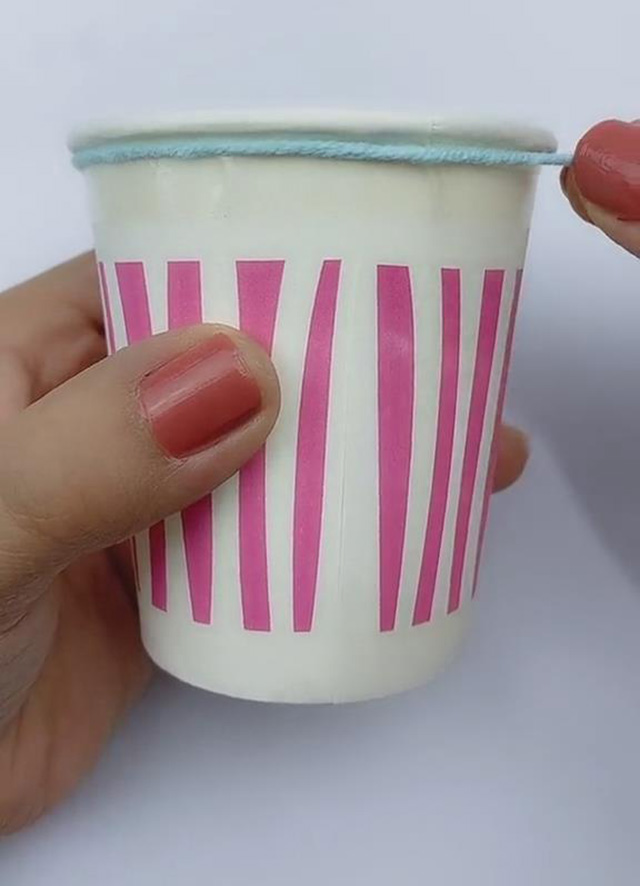
This step is important because this will be where we will place our decoration or our utensils. Choose a glass wide enough to fit everything you need, high so that your utensils do not fall (that is, do not use a plastic shot glass) and resistant so that it does not bend under the weight of the decoration that we will put inside. At the same time, keep in mind that if you use a glass that is too large, it can stand out a lot above the size of the wheels and the bicycle frame, which have a predetermined size.
With the glass we will do exactly the same: we will wrap it in wool on the outside. You will need to use glue so that the threads do not slip and it ends up undecorated. Also use drops of glue for the beginning and the end of the thread.
The inside of the glass can be painted, decorated or simply do nothing with it.
Step 4. Build the bike
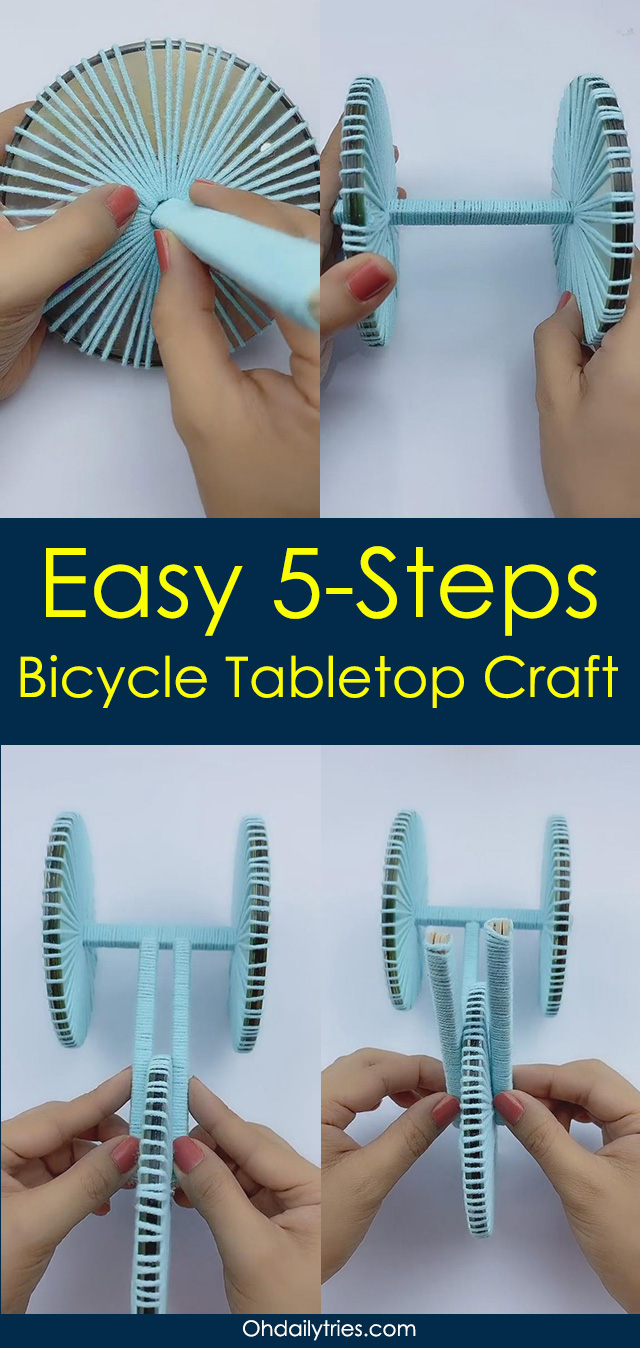
Now that we have all the necessary elements already prepared, it only remains to assemble them.
1. Place one of the bars between two wheels, they will be the rear wheels.
2. Glue two additional bars to the third wheel side and side. They should come out of the center and stick out on one of the sides. Those two bars will be glued in the center of the tube from the previous step.
3. On the front wheel (the one from step 2) add two more bars, placed in the same way but located towards the ceiling.
4. On top of the two bars from step 3, place the last bar perpendicular. This will act as a handlebar.
5. On top of the rear bar, the one that joins the two wheels from step 1, place the glass as if it were the seat.
6. Decorate your bike with decorative plastic beads: you can put it in the center of the rear wheels or on the handlebar.
Step 5. Decorate the bike
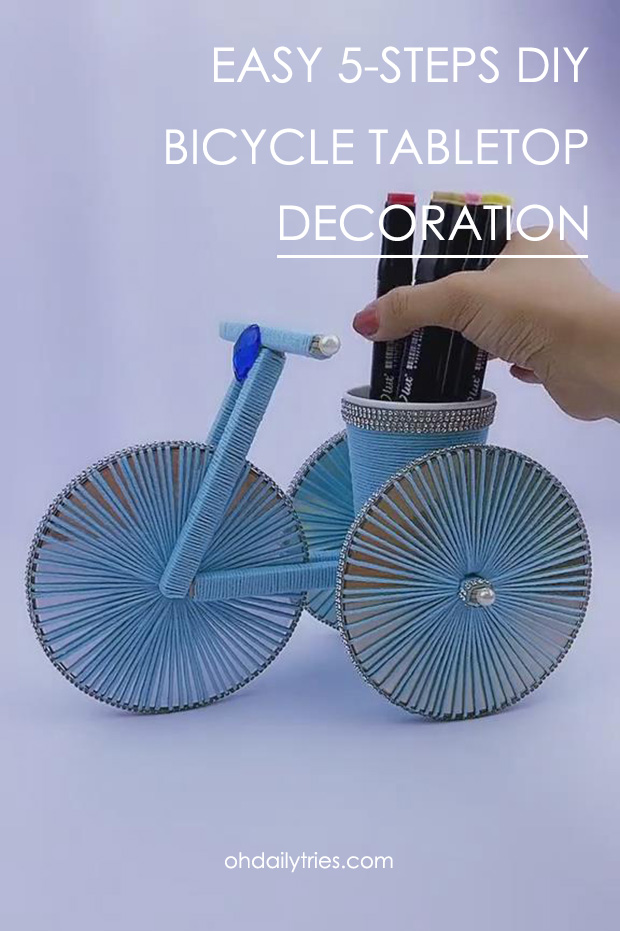
Decorate or use it to accommodate your stationery. You can place flowers, your markers or chocolates inside. It will serve to decorate your table or to store your office supplies.
And with these five very simple steps, you already have a beautiful bicycle that will decorate any room in your house. You can also place it on a shelf, next to the books, or use it to store the family keys in the hall. Get creative and decorate your home with this beautiful craft!

