If you have colored paper, threads and a small garbage bag, you can make a crafted toy in a super easy way by combining the techniques of thread and origami.
Follow these simple steps to get a handcrafted parachute. A very simple job to do with children and to enjoy for hours afterward. You can turn it into a competition and challenge them to get the one that falls slower, faster or more beautiful. Improvise an activity for family or friends, super entertaining and fun!
Materials needed:
– 3 sheets of colored paper (red, blue and black, for example)
– Scissors, ruler and pencil
– Glue
– Small size plastic garbage bag
– Sewing needle and thread (white)
Instructions:
Step 1. Prepare the paper with which we will work
First, remember you can choose paper in the colors you prefer for crafts or use the prepared ones for crafts or origami.
The first step will be to cut out the papers to have them ready to begin the origami work. We will need to cut the red and blue papers into a perfect square whose sides measure 15cm each. Then, we will cut the black paper into long and very thin strips (a couple of millimeters, approximately).
We will not need the rest of the paper for this craft.

Step 2. Fold the red paper
In this step we will use the red paper in the shape of a square.
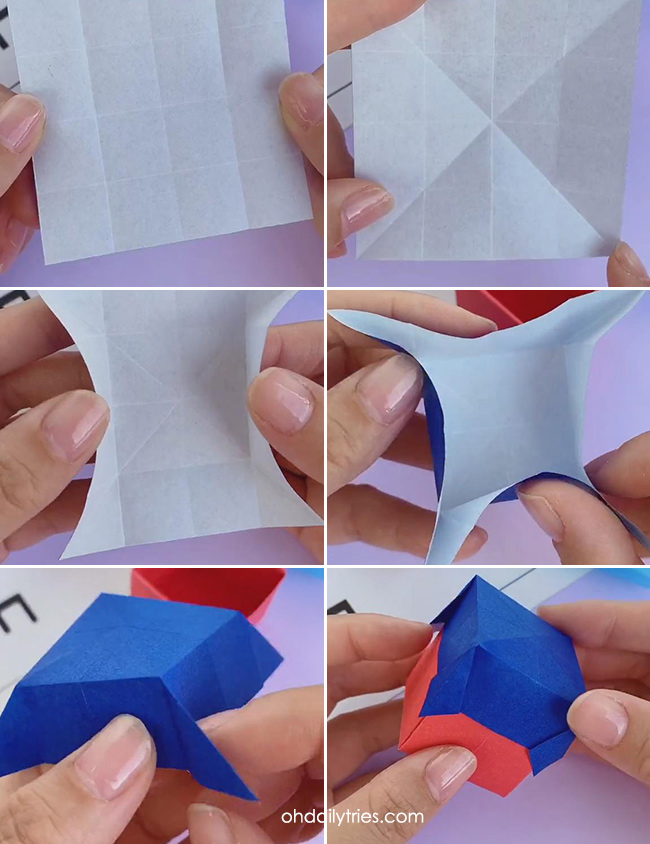
1. Fold the paper in half joining tip to tip. Unfold it and do the same with the other two ends. You will get a cross with the folds.
2. Unfold it. Now bring the four tips to the center.
3. Leave them folded, now you have a smaller square. With it, fold the paper like a triptych (in three parts), first one side and then the other.
4. Now unfold everything. We will use the fold lines to do the last step: take the midpoint of the diagonals and fold them inward. Doing so will leave raised walls around a square base.
5. Use the tips that stick up to fold them inward. Do it with all four.
You will have a box without a lid, a cube without one of the sides.

Step 3. Fold the blue paper
For this step we will use the blue square-shaped paper.
1. Fold the paper into four long strips on one side. Repeat the same process for the other. Then unfold it, you will have a 4 by 4 grid fold pattern.
2. Now join tip to tip from one side and repeat with the other, as in the first step with the red paper. Then unfold it. You will see that above the grid there is a cross-shaped fold.
3. Now lift the sides of the folded paper. You should have the four squares of the grid in the center as a base and the four raised sides.
4. Fold inwards (squashing them) the tips so they don’t stick out.
With this step we will have a blue lid for the red box.

Step 4. Glue the black strips
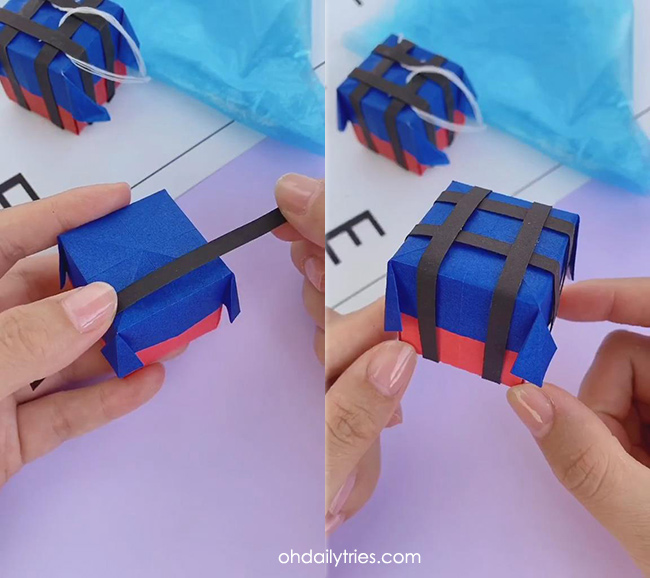
Glue the black strips around the closed box. With the strips, wrap the box from top to bottom, so that the lid fits well with the box. Put two strips vertically and two horizontally (make the strips cross at the top and at the bottom).

Step 5. Cut out the plastic bag
Cut out the base of the plastic bag and open it, spread out on the table. Get it to be rectangular in shape.
1. Join tip to tip. Without unfolding it, join the other end in the direction of the opposite end. You should have an edge because being rectangular, both ends will not touch.
2. Bring one of the sides of the triangle that you have left to the other side. You will have an even narrower triangle. Repeat it again: it will be narrower again.
3. Cut the short side of the triangle into a rounded shape.
4. Unfold the triangle only once (you will have a heart shape). With the needle, make a hole in the inner beak between the two petals.
When you unfold the plastic it should be in the shape of a flower.

Step 6. Attach the thread
With the plastic unfolded, use the needle and the thread to pass it through the holes that you previously made with the needle. One by one, do not pass the same thread through all the holes. Then tie all the ends of the threads with a knot in the black strips of the box.

And that’s it: now you have a very light parachute, made of paper and plastic, which if thrown into the sky will open and slowly fall. Enjoy it!

