Wheatgrass is a superfood. It can also be a super amazing wall art design. Capture a piece of the field in this Epoxy Resin project.
Epoxy Resin is an art medium which is absolutely fascinating. You can make any surface look like glass. It is a two-component system consisting of a resin and a hardener. Imagine, when these two components mix and solidify, they turn into a high gloss, clear plastic. Amazing, isn’t it? That being said, you can now dream about all the things you want to do with it – flowers in “glass” blocks (too bad you didn’t know about it before you got married. You could have preserved your bridal bouquet in a “glass” block), pressed flowers as pendants or drop earrings. Or what about making a collage of all your travel photos or family pictures and casting them in epoxy resin and turning it into a wall picture or a center table top?
Excited already? Let’s DIY!
MATERIALS and TOOLS:
About 1’ thick Wood of choice
Pentel pen or Pencil
Wood cutter machine
Few stems of Wheatgrass (dried)
3 plain trim boards
Acrylic sheet
Epoxy Resin
Hardener
Colorant – use light yellow or light gold tint to match the wheatgrass
DIY Stir bar
Wood wax oil
DIRECTIONS
Step 1. Gather all materials before starting your work. Clean all boards and sheets from dust to avoid getting into the design. Cover your work area with old newspapers because it can get sticky and messy.
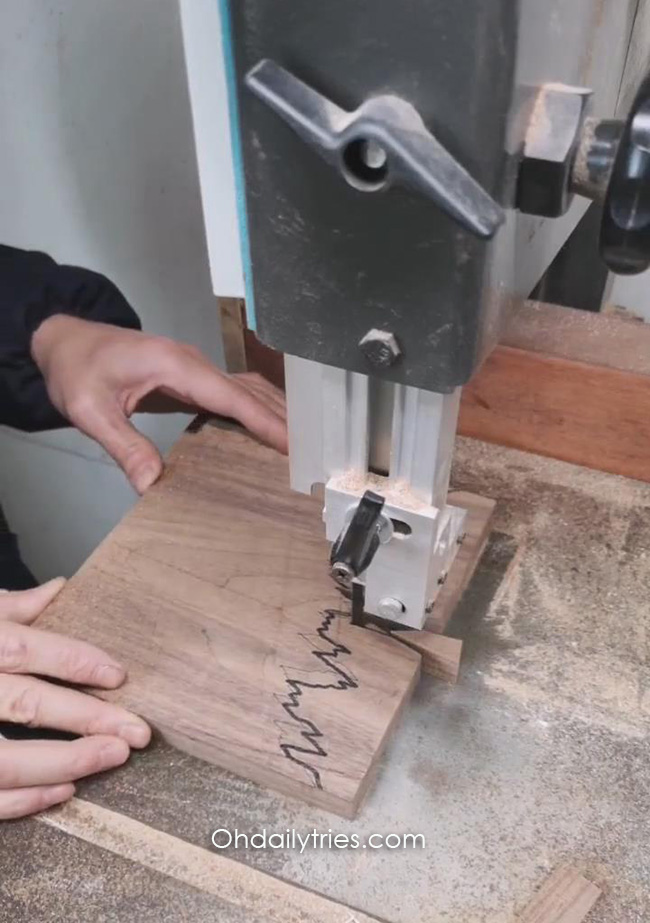
Using your pen or pencil, trace rugged edges on your wooden slab. These rugged edges should give the impression of the soil of the field.

Step 2. With your wood cutter machine, cut the wood along the rugged lines you traced.

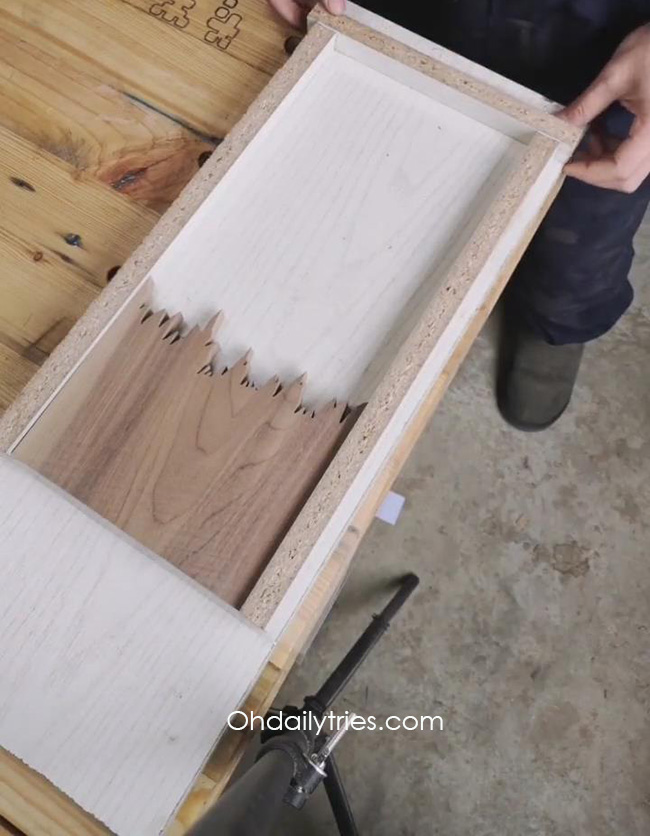
Step 3. Grab your acrylic sheets and cut them according to the size of wall art you intend to have. Consider the length of the rugged wood, the length of the wheatgrass stem, plus about an inch headspace.
On your working table, start laying down your design. On the acrylic sheet, place the rugged wood at the bottom and the 3 trim boards to the sides and top, to complete the frame.
Step 4. Stick the root end of the wheatgrass stems behind the rugged wood, to simulate them springing out of the soil. Be creative. Cut in different heights and spread the stems. Imagine how you would want the wheatgrass to look on your wall.
Prepare your epoxy resin. Follow directions on the package. Add the hardener and the colorant. Stir mixture using your stir bar.
Check your layout and clean from all dust and debris before pouring the epoxy resin mixture over your wheatgrass design.
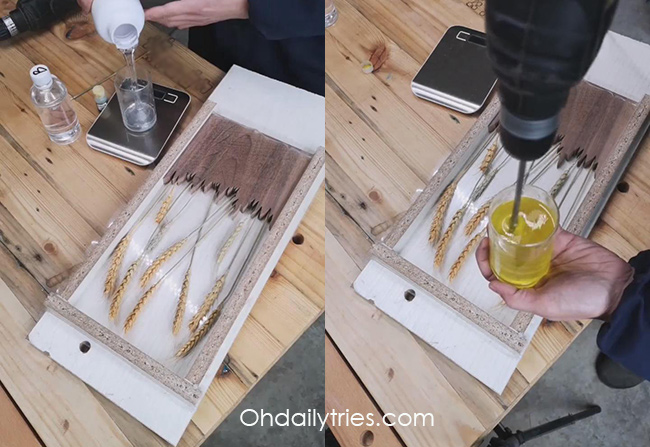
Step 5. After completely covering your design with epoxy resin mixture, check for bubbles. Wait a few minutes more to see if more bubbles will develop. It is best to use a butane torch to burst bubbles. With the torch, quickly run a flame across the resin to pop all bubbles.
Leave the design to set overnight.
TIP : Cover your project with a cardboard box to block any dust and debris. You don’t want it to be part of your design.
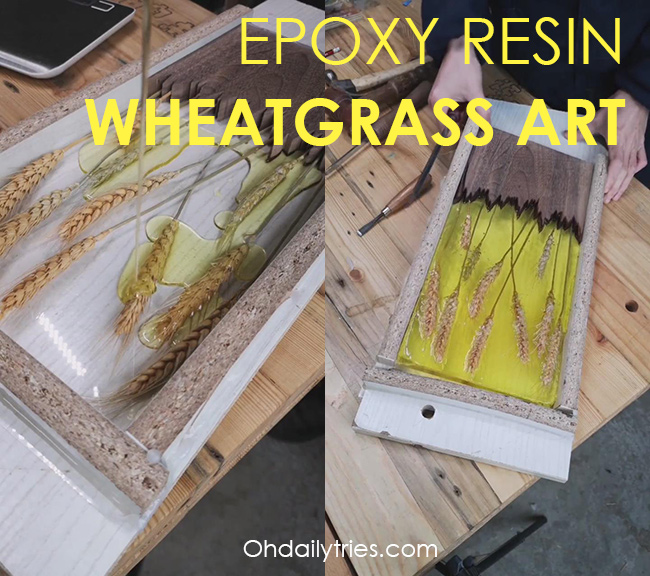
Step 6. The next day, carefully remove the acrylic sheet and trim boards to display your awesome wheatgrass epoxy resin wall art!
Rub wood wax oil on the rugged wood bottom for a more polished look.
TIP : To improve the sheen on the resin, you may use a dot of car polishing paste and rub all over the resin.