Have you ever been curious about making decorations from scratch? Well, it’s not just you but a lot of people today are thinking of making ornaments by themselves too! Aside from the affordable spend, DIY stuff will enable you to enhance your hand-eye coordination and fine motor skills. You just need to find interesting things that you like to assemble, say, a fall pumpkin topiary.
A fall pumpkin topiary is famous for its aesthetic beauty that accents your door, hallways, and other corners that you could think of for a seasonal welcome. If you look for this item in online stores, you might need to clear out your pocket of around 50-150USD. But if you want to save and learn a new skill, try our DIY steps for making a fall pumpkin topiary using dryer duct hose!
In making one, you need to prepare for the following tools and materials:
1. 4×8 plastic dryer duct (one package).
2. 3×8 Plastic dryer duct
3. Rust-Oleum spray paint in gloss ivory (or whatever color you prefer)
4. Rust-Eum spray paint in green apple
5. Stick (15-18 inches)
6. Transparent hot melt glue stick
7. Clothespins (optional)
8. Fall leaves and moss
9. Pliers
Directions:

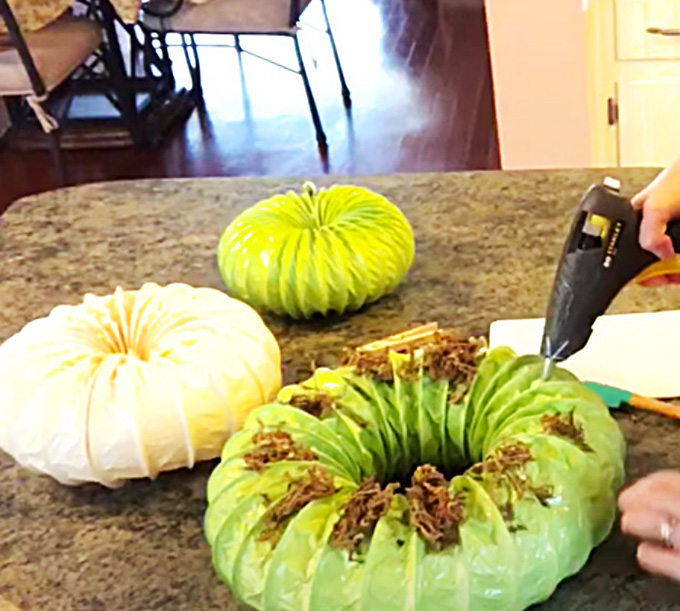
image By: The Magnolia Housewife Via YouTube
First, you need to cut the dryer ducts that you will use in making the pumpkin topiary. Make sure that you will cut them according to your pumpkin size preference. For you to have an idea, you can follow these measurements instead:
● For top of the topiary: 2 ½ ft.
● Middle about: 2 ft. & 5 in.
● Bottom about: 3 ½ ft.
Next, use hot melt glue to connect both ends of each duct. In this process, you can also use clothespins to hold the ends of each duct until it’s dry. You know you’re doing it right if the three ducts look like three pumpkins in different sizes and colors now. It may take a little while for the ends to stick together, but it’s definitely worth the wait.

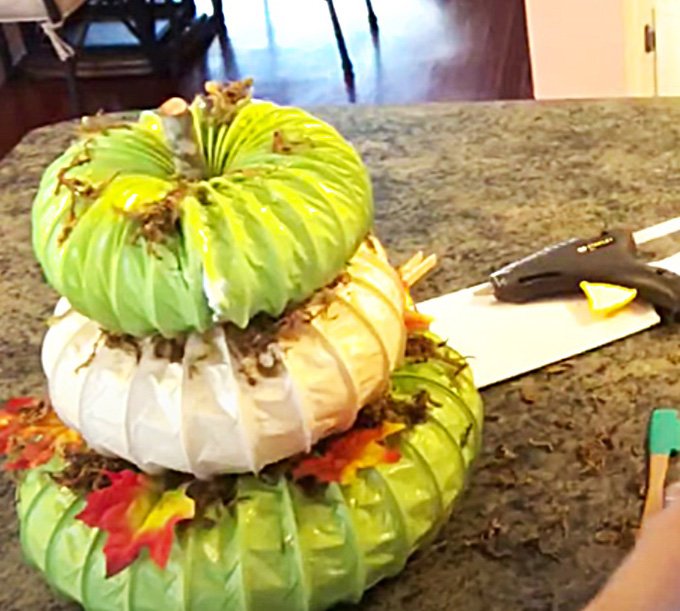
image By: The Magnolia Housewife Via YouTube
Then, get the prepared stick and put it in the middle of the pumpkins. It should hold the three pumpkins together. For the final touches, you can now get the moss and with the use of glue, stick it wherever you please. This part is optional since other people might not prefer moss over their pumpkin topiary. However, moss makes the pumpkins look more realistic.
After you sprinkle the moss, you can now use the leaves and place them in between the pumpkins or anywhere around. In fact, you can put other elements that you think can enhance the look of your DIY pumpkin topiary. You just have to be careful when you do this process since the glue can burn your skin. Wait for everything to dry and stick together. After these steps, you now have your elegant-looking fall pumpkin topiary that compliments with the season of leaves and sweaters!
